
The pantry – often an overlooked workhorse of the home – holds the power to transform your daily routine. Is yours a chaotic abyss where crackers go to expire, or a streamlined system that makes meal prep a joy? If the former rings true, you’re not alone. Many homeowners grapple with inefficient pantry spaces, leading to wasted food, duplicate purchases, and endless frustration. But imagine a different reality: a practical pantry, perfectly organized, where everything has its place and is easily accessible.
This isn’t just a dream; it’s an achievable goal. Planning practical pantry solutions isn’t about spending a fortune on fancy containers; it’s about thoughtful design, smart organization, and understanding your unique needs. In this in-depth guide, we’ll walk you through every step of crafting a pantry that truly works for you, turning kitchen chaos into culinary calm.
Why Your Pantry Needs a Purposeful Plan
A well-planned pantry is more than just a storage space; it’s the cornerstone of an efficient, stress-free kitchen. Without a clear strategy, even the largest pantry can quickly devolve into disarray.
Beyond Just Storage: The Benefits of a Smart Pantry
Think about the ripple effect of a practical pantry:
- Reduced Food Waste: When you can see what you have, you use it before it expires. This saves money and minimizes your environmental footprint.
- Easier Meal Planning & Prep: No more hunting for ingredients! A logical layout means faster cooking and less stress.
- Cost Savings: Avoiding duplicate purchases (because you thought you were out of canned tomatoes) adds up over time.
- Enhanced Kitchen Flow: A well-organized pantry contributes to an overall more functional and enjoyable kitchen environment.
- Peace of Mind: Knowing where everything is brings a subtle but significant sense of order and calm to your home.
Common Pantry Pitfalls to Avoid
Before we dive into solutions, let’s acknowledge the problems. Are any of these familiar?
- The "Black Hole" Effect: Deep shelves where items get lost and forgotten at the back.
- Lack of Categories: A jumble of baking supplies, snacks, and canned goods all mixed together.
- Wasted Vertical Space: Short items on tall shelves, leaving acres of unused air.
- Impulse Buys: No clear inventory means buying things you already own.
- Inaccessible Items: Reaching for heavy bags or jars becomes a precarious balancing act.
Addressing these issues is the first step toward a pantry transformation.
Step 1: Assess Your Current Pantry Reality
Before you buy a single bin or shelf, you need to understand what you’re working with – both in terms of space and contents. This foundational step is crucial for any effective pantry planning.
The Great Pantry Purge: Decluttering for Clarity
This is where the magic begins! Empty your entire pantry. Yes, everything. Lay it all out on your kitchen counters or a dining table. This might feel overwhelming, but it’s the only way to truly see what you have.
As you go through each item, ask yourself:
- Is it expired? (Toss it!)
- Is it something I actually use? (Be honest!)
- Is it nearing its expiration date? (Plan to use it soon.)
- Do I have multiple open packages of the same thing? (Consolidate!)
Taking Stock: Inventory and Categories
Once you’ve purged, group similar items together. You’ll likely see natural categories emerge:
- Baking supplies (flour, sugar, chocolate chips)
- Canned goods (vegetables, beans, soups)
- Pasta, rice, grains
- Snacks (granola bars, chips, cookies)
- Breakfast items (cereal, oatmeal)
- Spices and oils
- Beverages (tea, coffee, bottled water)
- Pet food
- Small appliances (blender, toaster)
This inventory helps you understand the volume and types of items you need to store.
Measuring Up: Dimensions and Available Space
Now, turn your attention to the empty pantry space. Grab a tape measure and note down:
- Overall dimensions: Height, width, and depth of the entire pantry.
- Shelf dimensions: For each shelf, measure its width, depth, and the vertical space above it.
- Door dimensions: If you have a pantry door, measure its width and height, noting any potential obstructions (like door handles hitting shelves).
These measurements are vital for choosing appropriate shelving, containers, and door organizers later on. Don’t forget to note the location of any electrical outlets if you plan to store small appliances.
Step 2: Define Your Pantry’s Role and Workflow
A practical pantry isn’t one-size-fits-all. It needs to be tailored to your household’s unique rhythm and culinary habits.
Who Uses It? Tailoring to Your Household
Consider everyone who interacts with the pantry:
- Single person or couple: Might need less bulk storage, more gourmet items.
- Family with young children: Requires accessible, child-friendly snack zones and space for baby food.
- Teenagers: Often need designated "grab-and-go" sections.
- Special dietary needs: Gluten-free, allergen-free, or specific diet items may need dedicated, clearly labeled areas.
Understanding Your Cooking Style and Grocery Habits
Your approach to food directly impacts your pantry needs:
- Frequent cook/baker: Will need robust storage for staples like flour, sugar, and spices, perhaps even dedicated baking zones.
- Meal prepper: Benefits from clear visibility and easy access to ingredients for batch cooking.
- Bulk buyer: Requires deep shelves or sturdy pull-out drawers for large quantities of non-perishables.
- Weekly shopper vs. daily trips: Affects how much fresh produce you might want to store in the pantry (e.g., potatoes, onions) versus the fridge.
- Entertainer: Needs space for serving dishes, party supplies, or larger quantities of beverages.
Zones of Efficiency: Creating Functional Areas
Based on your inventory and habits, mentally (or physically!) divide your pantry into zones. This is key to an efficient kitchen storage system.
- Everyday Essentials (Eye Level): The most frequently used items should be at eye level for easy access (e.g., spices, oils, often-used snacks).
- Heavy/Bulk Items (Bottom Shelves): Canned goods, beverages, root vegetables, and small appliances are best stored on sturdy bottom shelves or pull-out drawers.
- Infrequently Used Items (Top Shelves): Seasonal items, specialty ingredients, or extra stock can go up high.
- Baking Zone: Group all baking ingredients and tools together.
- Snack Zone: A dedicated, easily accessible spot for grab-and-go items.
- Meal Prep Zone: Ingredients often used together can be grouped.
Step 3: Designing for Optimal Storage and Accessibility
Now for the fun part: selecting the right tools and strategies to maximize every inch of your pantry. This is where your measurements and category lists become invaluable.
Shelving Savvy: Materials, Depths, and Adjustability
The right shelving is the backbone of any practical pantry.
- Adjustable Shelving: This is the gold standard! Being able to move shelves up or down allows you to customize vertical space for tall cereal boxes or short spice jars, eliminating wasted air.
- Shelf Materials:
- Wire Shelving: Offers excellent visibility and airflow, good for lighter items. Can sometimes lead to smaller items tipping, so shelf liners might be needed.
- Solid Wood/Laminate Shelving: Sturdy, aesthetically pleasing, and prevents items from falling through. Ideal for heavy items like canned goods or small appliances.
- Pull-out Shelves/Drawers: A game-changer for deep pantries, bringing items at the back into full view. Perfect for heavy bags of flour, pet food, or root vegetables.
- Shelf Depth:
- Shallow shelves (6-8 inches deep): Ideal for spices, cans (single file), and small jars, preventing items from getting lost.
- Medium shelves (12-16 inches deep): Versatile for most pantry staples like cereals, pasta, and larger containers.
- Deep shelves (18+ inches deep): Best for bulk items, small appliances, or incorporating pull-out solutions. Avoid deep fixed shelves if possible, as they create "black holes."
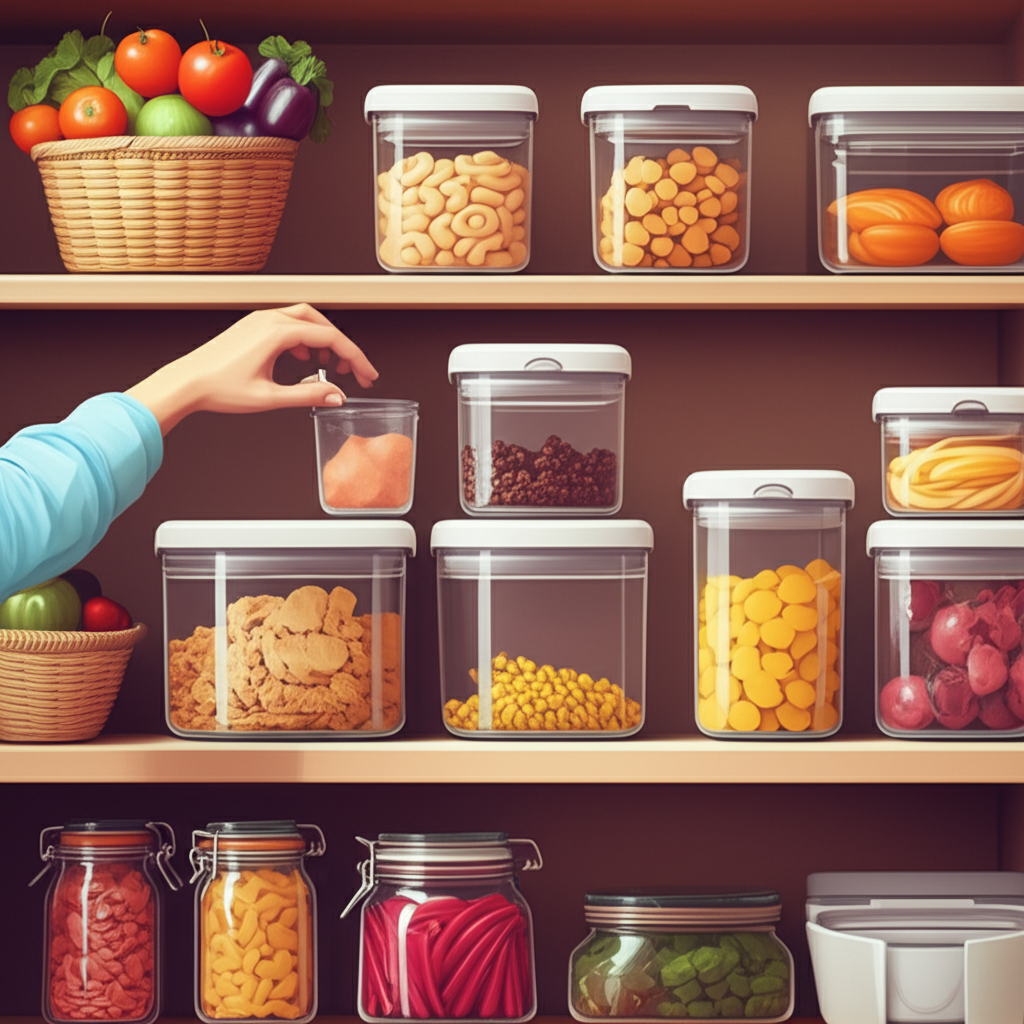
Container Confidential: Choosing the Right Vessels
Containers are your allies in maintaining order and freshness.
- Airtight Containers: Essential for dry goods like flour, sugar, pasta, rice, and cereal. They keep food fresh, deter pests, and create a uniform, aesthetically pleasing look. Opt for clear containers so you can easily see contents and quantities.
- Clear Bins and Baskets: Excellent for grouping items within categories (e.g., "Snacks," "Lunchbox Items," "Baking Mixes"). They contain clutter and make it easy to pull out a whole category at once.
- Stackable Solutions: Maximize vertical space with stackable bins or containers, especially for items like canned goods (using can organizers) or smaller packaged snacks.
- Lazy Susans (Turntables): Perfect for corner cabinets or for organizing oils, vinegars, spices, or condiments, making everything easily accessible with a spin.
- Dividers: Use drawer dividers for small packets, or vertical dividers for baking sheets, cutting boards, or platters.
Beyond the Shelf: Utilizing Every Nook and Cranny
Don’t forget the often-underutilized areas!
- Pantry Door Organizers: Over-the-door or wall-mounted racks are fantastic for spices, small jars, cleaning supplies, or even rolls of foil/plastic wrap. Just ensure they don’t obstruct the shelves when the door closes.
- Wall-Mounted Racks: If you have empty wall space, consider installing small shelves or pegboards for hanging items like aprons, kitchen tools, or even small baskets.
- Under-Shelf Baskets: These clever additions clip onto existing shelves, creating an extra layer of storage for lightweight items.
- Vertical Space Solutions: Shelf risers can double your storage capacity for shorter items like cans or small bottles.
Step 4: Implementing Your Pantry Plan
With your design in mind and your chosen organizational tools ready, it’s time to bring your practical pantry to life!
The Art of Placement: Logical Grouping and FIFO
- Group Like with Like: This is the golden rule. All baking ingredients together, all breakfast items together, etc.
- Frequency of Use: Place frequently used items at eye level and within easy reach. Less common items can go higher or lower.
- First-In, First-Out (FIFO): When stocking new groceries, place older items at the front of their respective sections so they are used first. This is crucial for reducing food waste.
- Decanting: Transferring dry goods from original packaging into airtight containers not only looks tidier but also helps you see quantities and protects against pests.
Labeling for Lasting Order
Don’t underestimate the power of clear, consistent labeling.
- Contents: Label all containers with their contents (e.g., "All-Purpose Flour," "Brown Sugar," "Lentils").
- Expiration Dates: For decanted items, jot down the expiration date from the original packaging onto the label or the bottom of the container.
- Categories: Label bins or baskets with their category (e.g., "Snacks," "Dinner Mixes," "Pasta").
- Tools: Use a label maker, chalkboard labels, or even simple masking tape and a marker. Consistency helps.
Lighting Up Your Storage Space
Good lighting makes a huge difference. If your pantry is dim, consider adding:
- Battery-operated LED puck lights: Easy to install under shelves or on the ceiling.
- Motion-sensor strip lighting: Illuminates automatically when you open the door.
- Hardwired lighting: For larger walk-in pantries, a proper ceiling fixture is ideal.
Visibility isn’t just about finding things; it’s about seeing what you have and enjoying the space.
Step 5: Maintaining Your Practical Pantry
A well-planned pantry isn’t a one-and-done project. It requires a little ongoing love to stay practical and pristine.
Regular Check-ins and Mini-Purges
Schedule a quick pantry check-in once a month or every few weeks.
- Expiry Date Scan: Quickly check labels for items nearing their expiration.
- Tidy Up: Straighten containers, wipe up spills, and put things back in their designated spots.
- Grocery Day Reset: After a grocery run, take a few extra minutes to restock using the FIFO method and ensure new items fit into your system.
Adapting to Changing Needs
Life changes, and so should your pantry.
- Family growth/changes: New diets, new family members, or kids growing up will shift your needs.
- Cooking habits: If you start a new cooking style or hobby, reassess your zones.
- Seasonal shifts: You might need more canning supplies in summer, or baking ingredients in winter.
Don’t be afraid to tweak your system. A truly practical pantry is one that evolves with you.
Conclusion: Your Journey to a Practical, Pristine Pantry
Planning practical pantry solutions is an investment in your home, your time, and your peace of mind. It’s a process that moves beyond simple decluttering to thoughtful design, tailored to your unique lifestyle. By assessing your current situation, defining your needs, designing with smart storage solutions, implementing a logical system, and committing to regular maintenance, you can transform your pantry from a source of stress into a beacon of organization.
Imagine opening your pantry door to a clear, functional space where every item is visible, accessible, and ready for its purpose. This isn’t just about neat shelves; it’s about empowering your culinary adventures, saving money, and bringing a renewed sense of calm and efficiency to the heart of your home. Start planning your practical pantry today – your future self (and your grocery budget) will thank you!