
Spring is a season of renewal, a vibrant canvas awaiting your artistic touch. For DIY lovers, it’s the perfect time to roll up those sleeves and infuse outdoor spaces with personalized charm. And when it comes to maximizing impact with minimal fuss, container gardening stands out as the ultimate spring superpower. Forget the intimidating thought of tilling vast plots; container solutions offer unparalleled flexibility, creativity, and accessibility, transforming even the smallest balcony or patio into a flourishing oasis.
Imagine sipping your morning coffee surrounded by a burst of fragrant blooms, or plucking fresh herbs for dinner straight from a charming repurposed planter. This isn’t just gardening; it’s an extension of your home, your style, and your passion for creating. This in-depth guide will walk you through everything you need to know to cultivate stunning, thriving container gardens this spring, tailored perfectly for your DIY spirit.
Embrace the Spring Bloom: Your DIY Guide to Container Gardening Success
Why is container gardening such a game-changer for the hands-on enthusiast? It’s all about control, creativity, and convenience.
The Allure of Portability: Design Freedom
One of the greatest joys of container gardening is its inherent mobility. Your garden isn’t static; it’s a dynamic display you can rearrange on a whim. Follow the sun’s path, create new focal points for outdoor gatherings, or tuck delicate plants away from harsh weather. This flexibility allows you to experiment with different arrangements and aesthetics, keeping your outdoor decor fresh and exciting throughout the season.
Space-Saving Solutions: Big Dreams, Small Footprint
Whether you have a sprawling backyard or a petite urban balcony, containers make gardening possible for everyone. They allow you to utilize vertical space, narrow ledges, and forgotten corners, turning previously unused areas into lush, green retreats. Think upwards with tiered planters or outwards with window boxes – every square inch becomes an opportunity.
Tailored Environments: Perfect Conditions Every Time
Not all plants are created equal, and not all garden soils are ideal. With containers, you become the master of your plants’ environment. You can provide the exact soil type, drainage, and light exposure each plant craves, ensuring optimal growth and health. This precision means you can successfully grow plants that might struggle in your native garden soil.
Pest & Weed Control: Your Secret Weapon
Container gardening significantly reduces the battle against weeds and many common garden pests. Weeds have less space to establish, and pests are often easier to spot and manage when confined to a specific pot. This focused approach means less time weeding and more time enjoying your beautiful plants.
Budget-Friendly Beginnings: DIY on a Dime
Starting a container garden doesn’t require a hefty investment. Many of the most charming and effective containers can be found or created from items you already own or can acquire affordably. This aligns perfectly with the DIY ethos of resourcefulness and creativity.
Beyond the Basics: Innovative Container Choices for Every Style
The "container" itself is where your DIY creativity truly shines. Don’t limit yourself to standard pots; think outside the box – literally!
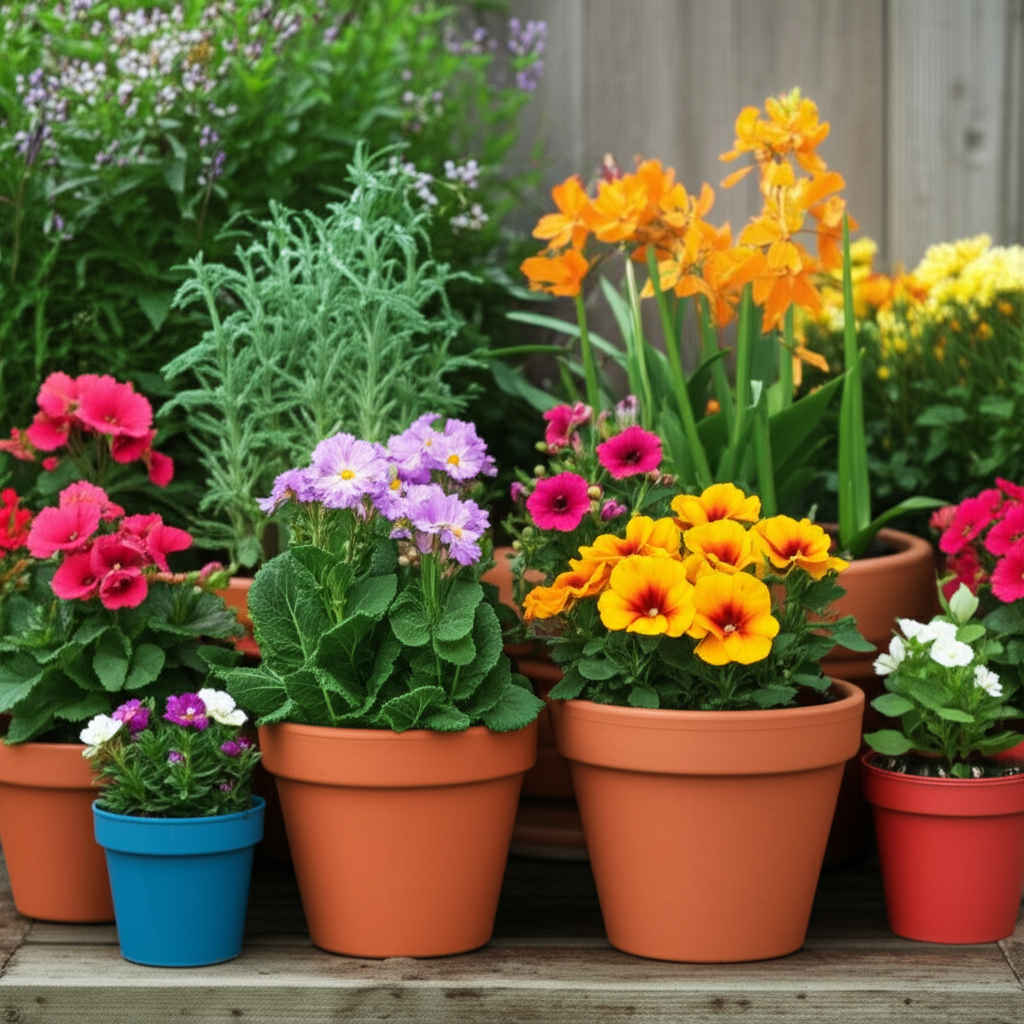
Classic & Timeless: Terracotta, Ceramic, Wood
- Terracotta: These porous clay pots are breathable, allowing air and moisture to pass through, which is great for plants that prefer drier soil. Their earthy tone is classic and complements almost any plant. DIY Tip: Over time, terracotta develops a beautiful white patina. If you prefer a cleaner look, a scrub with a stiff brush and diluted vinegar can refresh them.
- Ceramic: Often glazed, ceramic pots come in an endless array of colors and finishes, adding a decorative pop. They retain moisture better than terracotta, making them suitable for thirstier plants. Be mindful of their weight, especially when filled with soil.
- Wood: Wooden planters, barrels, and raised beds offer a rustic, natural aesthetic. They are excellent insulators, protecting roots from temperature fluctuations. DIY Tip: Line wooden containers with heavy-duty plastic sheeting (punctured for drainage) to extend their lifespan by preventing direct soil contact and moisture damage.
Modern & Lightweight: Plastic, Resin, Fabric Pots
- Plastic & Resin: These are incredibly versatile, lightweight, and often budget-friendly. They come in various shapes, sizes, and colors, some even mimicking the look of more expensive materials. They retain moisture well, which can be a boon in hot climates.
- Fabric Pots (Grow Bags): A relatively new innovation, fabric pots are fantastic for root health. Their breathable material air-prunes roots, preventing circling and encouraging a more fibrous, efficient root system. They are lightweight, foldable for storage, and great for edibles.
Upcycled & Repurposed: Unleash Your Creativity
This is where your DIY heart can truly soar! Almost anything that can hold soil and drain excess water can become a planter.
-
Galvanized Tubs & Buckets: These rustic beauties add instant farm-chic charm. Drill several drainage holes (1/4 to 1/2 inch) in the bottom using a metal drill bit.
-
Wooden Crates & Pallets: Stack them, hang them, or stand them up. Line with landscape fabric or plastic to protect the wood.
-
Old Tires: Paint them vibrant colors and stack them for a unique tiered planter. Ensure ample drainage.
-
Colanders & Strainers: Their built-in holes are perfect for drainage, making them excellent hanging planters for herbs or succulents.
-
Vintage Watering Cans, Teapots, Boots: For smaller, whimsical displays, these can hold a single plant or a small arrangement. Just ensure drainage is adequate.
-
Cinder Blocks: Arrange them into creative patterns for a modular, modern planter system.
-
DIY Drainage Hole Tip: For any solid container without drainage, use a drill with an appropriate bit (wood bit for wood, masonry bit for ceramic, metal bit for metal). Start with a smaller pilot hole, then gradually increase the size. Aim for at least 3-5 holes spread across the bottom for adequate drainage.
Specialty Containers: Vertical Gardens & Self-Watering Pots
- Vertical Planters: Ideal for small spaces, these systems allow you to grow upwards, perfect for herbs, strawberries, or cascading flowers. You can DIY these with stacked pallets, shoe organizers, or repurposed plastic bottles.
- Self-Watering Pots: These clever containers have a reservoir at the bottom, wicking water up to the soil as needed. They’re a fantastic solution for busy DIYers or those prone to forgetting to water.
Nurturing Your Green Oasis: The Essentials for Thriving Containers
Once you’ve chosen your canvas, it’s time to fill it with the ingredients for success.
The Right Mix: Potting Soil vs. Garden Soil
This is crucial. Always use a high-quality potting mix for containers, never garden soil. Garden soil compacts too easily in pots, suffocating roots and hindering drainage. Potting mix is specifically formulated to be light, airy, and well-draining, while retaining enough moisture and nutrients. Look for mixes containing peat moss, coir, perlite, or vermiculite. For an extra boost, mix in some compost for added nutrients and beneficial microbes.
Drainage is Key: Preventing Soggy Roots
We can’t stress this enough: good drainage is paramount. Without it, roots sit in stagnant water, leading to rot and plant death.
- Drainage Holes: Ensure every container has them!
- The Gravel Layer Myth: Contrary to popular belief, adding a layer of gravel or broken pot shards at the bottom of a container does not improve drainage. It actually creates a "perched water table," raising the level at which water accumulates and potentially leading to root rot. Instead, simply ensure your potting mix fills the container directly above the drainage holes. A piece of landscape fabric or a coffee filter over the holes can prevent soil from washing out.
Perfect Plant Pairings: Thriller, Filler, Spiller (TFS)
For visually stunning arrangements, embrace the "Thriller, Filler, Spiller" concept:
- Thriller: A tall, dramatic plant placed in the center or back of the container, providing height and a focal point.
- Spring Examples: Ornamental grasses, upright fuchsia, geraniums, cannas (in larger pots).
- Filler: Medium-height plants that fill out the middle ground, adding bulk and lushness.
- Spring Examples: Petunias, calibrachoa, impatiens (for shade), marigolds, salvia, coleus.
- Spiller: Trailing plants that cascade over the edge of the container, softening the edges and adding elegance.
- Spring Examples: Sweet potato vine, ivy, lobelia, creeping Jenny, dichondra.
When selecting plants, always consider their sun exposure requirements (full sun, partial shade, full shade) and water needs. Group plants with similar requirements together for easier care.
Watering Wisdom: Hydration Hacks for Happy Plants
Container plants dry out faster than in-ground plants.
- Check Daily: Especially during warm, windy weather. Stick your finger an inch or two into the soil. If it feels dry, it’s time to water.
- Water Thoroughly: Water until you see it draining from the bottom. This ensures the entire root ball is moistened.
- Avoid Overhead Watering: Water the soil directly to prevent fungal diseases on foliage.
- Consider Self-Watering Systems: For larger containers or when you’re away, a simple DIY drip system from a repurposed plastic bottle or wicking system can be a lifesaver.
Feeding Your Flora: Nutrient Needs
Potting mix contains limited nutrients, so regular feeding is essential.
- Slow-Release Fertilizer: Incorporate a granular slow-release fertilizer into the potting mix at planting time for continuous feeding.
- Liquid Feed: Supplement with a balanced liquid fertilizer every 2-4 weeks during the active growing season. Always follow package directions.
Unleash Your Inner Gardener: Inspiring DIY Container Projects
Ready to get your hands dirty? Here are some project ideas to ignite your spring creativity:
The Herb Haven: Fresh Flavors at Your Fingertips
Create a culinary masterpiece right outside your door.
- Project Idea: A tiered herb garden using stacked terracotta pots of varying sizes or a repurposed pallet garden.
- Spring Herbs: Basil, mint, chives, parsley, oregano, thyme, rosemary. Place sun-loving herbs together. Mint is best in its own pot as it can be invasive.
Edible Elegance: Veggies & Fruits in Pots
You don’t need a large garden to grow your own produce.
- Project Idea: A "salad bowl" container. Use a wide, shallow container for a mix of different lettuce varieties, spinach, and radishes.
- Container-Friendly Edibles: Cherry tomatoes (bush varieties), bush beans, bell peppers, small eggplant varieties, radishes, carrots (short varieties), strawberries, blueberries (in large, acidic-soil pots).
Burst of Blooms: A Symphony of Color
Transform your patio or porch into a vibrant floral display.
- Project Idea: Hanging baskets or window boxes. These are perfect for showcasing "spiller" plants.
- Spring Bloomers: Pansies, violas (early spring), petunias, calibrachoa, impatiens (for shade), lobelia, geraniums, marigolds, snapdragons. Experiment with contrasting colors and textures.
Themed Gardens: Tell a Story
Let your containers tell a tale.
- Project Idea: A "cottage garden" container with a whimsical mix of flowers like cosmos, sweet alyssum, and a climbing clematis on a small trellis. Or a "succulent desert" dish garden with various cacti and succulents arranged artfully with decorative rocks.
Keeping Your Containers Thriving: Tips & Tricks
Your DIY masterpiece deserves ongoing care to look its best.
Regular Deadheading & Pruning: Encourage More Blooms
Remove spent flowers (deadheading) to encourage the plant to produce more blooms rather than setting seed. Prune back leggy growth to maintain a bushy, attractive shape.
Pest Patrol: Early Detection is Key
Inspect your plants regularly for signs of pests like aphids, spider mites, or whiteflies. Early detection makes control much easier, often with simple solutions like a strong spray of water or insecticidal soap.
Seasonal Swaps: Adapting to Changing Weather
As spring transitions to summer, some early spring annuals might fade. Be ready to swap them out for heat-tolerant plants to keep your containers looking fresh.
Winterizing: Preparing for Next Spring
While this article focuses on spring, a true DIY lover thinks ahead! For perennial plants in containers, consider moving them to a sheltered location, wrapping pots with burlap for insulation, or bringing tender plants indoors for winter protection. Clean and store empty containers for next year.
Your Spring, Your Sanctuary, Your DIY Success
Container gardening is more than just planting; it’s an art form, a stress reliever, and a testament to your DIY spirit. This spring, don’t just dream of a beautiful outdoor space – create it! With the right containers, soil, plants, and a dash of creativity, you can cultivate a vibrant, personal sanctuary that reflects your unique style and brings joy with every bloom and leaf. So, gather your tools, unleash your imagination, and get ready to witness the magic of your very own DIY container garden. Happy planting!