
There’s something uniquely calming about bringing the outside in, especially when it’s crafted with your own hands. Macrame, the ancient art of knot-tying, offers a wonderful avenue to do just that. If you’ve been captivated by the intricate beauty of macrame but felt intimidated by complex patterns, you’re in for a treat. This guide is specifically designed for beginners eager to explore macrame designs inspired by one of nature’s most enduring symbols: the tree.
Beginner’s macrame doesn’t have to mean simple squares or basic plant hangers. Creating a macrame tree wall hanging is not only incredibly rewarding but surprisingly accessible. Imagine a delicate silhouette of a tree, its trunk and branches woven from soft cords, adorning your living space. It’s a project that combines therapeutic knotting with stunning visual impact, proving that even as a novice, you can craft something truly special. Let’s embark on this creative journey, learning the fundamental techniques to grow your own beautiful knotted forest.
Why Choose Macrame Trees? The Allure of Nature in Knots
Before we dive into the nitty-gritty, let’s understand why a tree motif is an excellent starting point for your macrame adventure and why it resonates so deeply with us.
Symbolism and Serenity
Trees are universal symbols of life, growth, strength, and connection. They ground us, reaching deep into the earth while stretching towards the sky. Translating this powerful imagery into a handmade macrame piece brings a sense of serenity and natural beauty into your home. Each knot you tie becomes part of this symbolic representation, making the creation process itself a meditative experience. It’s more than just decor; it’s a piece with meaning.
Versatility in Decor
Whether your home boasts a bohemian vibe, a rustic farmhouse feel, or a clean modern aesthetic, a macrame tree can seamlessly integrate. The organic lines and neutral tones of natural cotton cord complement a wide array of interior styles. A large, dramatic tree can be a focal point, while smaller versions can add subtle texture and warmth to a gallery wall or a cozy reading nook. They introduce an earthy, calming element that feels both timeless and contemporary.
A Perfect Starting Point for Beginners
Many easy macrame projects focus on repetitive patterns, and the tree design is no exception. While it looks complex, a macrame tree primarily relies on just a few core knots repeated strategically. This repetition allows you to build muscle memory, gain confidence, and see tangible progress quickly. You’ll be surprised at how fast you can pick up the rhythm, making it an ideal choice for anyone new to the craft.
Essential Supplies for Your First Macrame Tree Project
Getting started with macrame requires only a handful of tools and materials. Don’t worry about investing in an expensive kit; the basics are all you need to begin your tree macrame journey.
Choosing Your Cord: The Foundation of Your Forest
The type and thickness of cord you choose will significantly impact the final look and feel of your macrame tree.
- Material:
- Cotton: This is by far the most popular choice for beginners due to its softness, ease of knotting, and beautiful drape. It comes in various forms like single-strand twisted (for soft fringes), 3-ply twisted (for more defined knots), and braided (for durability). For a tree, 3-ply or single-strand cotton is excellent.
- Jute/Hemp: Offers a more rustic, earthy look and feel. It can be a bit stiffer to work with but creates wonderful texture.
- Synthetic: Less common for decorative wall hangings but good for outdoor pieces due to weather resistance. Stick with cotton for your first tree.
- Thickness:
- 3mm-5mm: This range is perfect for macrame for beginners. Thinner cords (3mm) create more delicate, intricate details, while thicker cords (5mm) make bolder knots and a more substantial piece, which can be easier to handle initially. A 4mm single-strand or 3-ply cotton cord is a fantastic all-rounder.
Practical Tip: For your first project, choose a natural, un-dyed cotton cord. It’s forgiving, easy to undo mistakes, and truly showcases the beauty of the knots.
The All-Important Dowel or Branch
This is the anchor for your macrame tree.
- Wooden Dowel: Readily available at craft or hardware stores. Choose a smooth, sanded dowel for a clean, uniform look. The length will depend on the size of your desired tree – typically 10-20 inches for a medium-sized wall hanging.
- Natural Branch/Driftwood: For a truly organic, rustic feel, find a beautiful piece of driftwood or a sturdy fallen branch. Ensure it’s clean, dry, and free of insects. You might want to lightly sand any rough spots to prevent snags.
Preparation: If using a natural branch, ensure it’s completely dry. You can bake smaller branches at a low temperature (around 200°F or 90°C) for an hour or two to sterilize them and ensure dryness.
Basic Tools You’ll Need
- Sharp Scissors: Essential for clean cuts and trimming fringes.
- Measuring Tape: Accurate measurements save cord and ensure symmetry.
- S-hooks or Clothes Rack: You’ll need somewhere to hang your dowel while you work. A clothes rack, a curtain rod, or even a sturdy doorknob with S-hooks will do.
- Optional: Comb/Pet Brush: For brushing out fringes to create soft, feathery leaves or roots.
Mastering the Core Knots for Your Macrame Tree
You don’t need to learn dozens of knots to create a beautiful macrame tree. These three fundamental macrame knots for trees will form the backbone of your design. Practice them a few times before starting your project.
The Lark’s Head Knot: Attaching Your Branches
This is how you attach your cords to your dowel or branch. It’s simple, secure, and creates a neat foundation.
- How to: Fold a piece of cord in half. Place the looped end over the dowel. Bring the two working ends of the cord over the dowel and through the loop. Pull tight.
- Purpose: Forms the top edge of your macrame piece and is the starting point for all subsequent knots.
The Square Knot: Building the Trunk and Branches
The square knot is the most important knot for creating the dense, textured look of a tree trunk and its sturdy branches. It’s made of two half-hitch knots.
- How to (using four cords):
- Left Half-Knot: Take the left-most cord (cord 1) over the two middle cords (cords 2 & 3) and under the right-most cord (cord 4). Then take cord 4 under the two middle cords and up through the loop created by cord 1. Pull snug.
- Right Half-Knot: Now, take the right-most cord (which was cord 4) over the two middle cords and under the left-most cord (which was cord 1). Then take cord 1 under the two middle cords and up through the loop created by cord 4. Pull snug.
- Purpose: Creates a flat, strong knot. By repeating rows of square knots, you can build solid, textured sections for your tree’s trunk and branches.
The Half Hitch Knot (or Double Half Hitch): Shaping the Canopy
While square knots build bulk, the double half hitch knot is fantastic for creating clean lines, curves, and defining shapes – perfect for outlining the canopy or adding subtle leaf-like textures.
- How to (using two cords):
- Designate one cord as the "filler cord" (this will be the foundation) and the other as the "working cord" (this does the knotting).
- Take the working cord over the filler cord, then under itself, and pull tight. This is one half hitch.
- Repeat this exact motion with the same working cord over the same filler cord. This completes a double half hitch.
- Purpose: When tied diagonally, it can create beautiful, structured outlines for leaves or the overall shape of your tree’s crown. You can also use a series of vertical or horizontal double half hitches for different textures.
Your First Macrame Tree Design: A Simple Wall Hanging Project
Now that you have your supplies and know your knots, let’s create a beautiful macrame tree wall hanging. We’ll focus on a classic design that emphasizes the trunk and a simple, full canopy.
Planning Your Tree’s Silhouette
Before cutting, sketch out a rough idea of your tree.
- Size: How tall and wide do you want your tree to be?
- Trunk: Will it be straight or slightly curved? How thick?
- Canopy: Will it be rounded, triangular, or more organic?
- Fringe: How long will your "roots" or hanging fringe be?
Cord Length Calculation: A general rule of thumb for beginners is to cut your cords roughly four times the desired finished length of your project. For example, if you want a 20-inch long tree, cut cords that are 80 inches long. You’ll need several cords, depending on the desired width of your tree. For a small tree (10-12 inch dowel), 12-16 cords (24-32 working cords once folded) is a good start.
Step-by-Step: The Classic Macrame Tree Wall Hanging
-
Preparation: Attach Cords to the Dowel
- Cut all your cords to the calculated length.
- Fold each cord in half and attach them to your dowel using the Lark’s Head Knot. Space them evenly across the dowel. You now have twice as many working cords as you have cut pieces.
-
Creating the Trunk
- Identify the central group of cords that will form your trunk (e.g., 8-12 middle cords).
- Using four cords at a time, tie a row of Square Knots directly below the Lark’s Head knots.
- Continue tying rows of Square Knots, staggering them (skip the first two cords, tie a knot, then skip two, etc., to create a brick-like pattern) to build a solid, textured trunk. You can narrow the trunk slightly by leaving out outer cords as you go down, or widen it by incorporating more. Aim for a trunk length that feels proportionate to your planned tree size.
-
Branching Out (Optional but Recommended)
- Once your trunk reaches your desired height, you can begin to form branches.
- Divide the cords from the trunk into two or three sections.
- Work on each section independently, continuing with rows of Square Knots but leaving a gap between sections to define the branches. You can also use diagonal Double Half Hitch knots to create the upward curve of a branch.
-
Filling in the Canopy (Leaves/Foliage Effect)
- This is where you bring your tree to life. There are several ways to create the canopy:
- Dense Square Knot Clusters: Continue tying Square Knots across the entire width above your branches. You can vary the density and shape by tying knots closer together or leaving small spaces. This creates a full, textured canopy.
- Diagonal Double Half Hitch: Use a filler cord running diagonally (e.g., from the outer edge inwards) and tie working cords onto it with Double Half Hitch knots. This creates a clean, defined edge for a leaf shape or a rounded canopy. You can then fill the inside with more knots or leave it open for a skeletal look.
- Gathering and Trimming: Once you have a basic shape, you can gather sections of cords together and tie them with an additional small piece of cord or a simple knot to create a "clump" of leaves. Then, trim the excess cords below these knots in a rounded or organic shape.
- This is where you bring your tree to life. There are several ways to create the canopy:
-
Finishing Touches: The Roots and Hanging Loop
- Fringe: Once your canopy is complete, the remaining unknotted cords below will form your "roots" or bottom fringe. Trim them to your desired length and shape (e.g., a gentle curve, a V-shape, or straight across). For a softer, feathery look, untwist single-strand cords and comb them out.
- Hanging Loop: Take an extra piece of cord (about 12-18 inches long) and tie each end to the top ends of your dowel with a simple knot or a Lark’s Head knot. This creates the loop to hang your macrame tree.
Tips for Personalizing Your Tree
- Add Beads: Incorporate wooden or ceramic beads into your design by threading them onto cords before tying knots. They can represent fruit or simply add decorative elements.
- Vary Cord Colors: While natural is beautiful, try incorporating a few strands of green for leaves or brown for a multi-toned trunk.
- Experiment with Fringe: Play with asymmetrical fringe lengths or add small knots within the fringe for extra texture.
- Incorporate Found Objects: Once you’re comfortable, try knotting around small, smooth stones at the "roots" or using tiny pinecones within the canopy for extra natural charm.
Expanding Your Macrame Forest: Next Steps and Variations
Once you’ve successfully completed your first macrame tree wall hanging, you’ll have gained the confidence and skills to explore more complex designs and applications.
From Wall Hangings to Plant Hangers
The tree motif isn’t limited to wall art. You can adapt the trunk and branch-like knotting patterns to create unique plant hangers. Imagine a small potted plant suspended within a macrame ‘tree’ structure, bringing even more greenery into your home.
Incorporating Found Objects
Take your natural inspiration a step further. Instead of just a dowel, use a beautiful piece of gnarled driftwood as the base for your tree. You could even weave small, polished river stones into the base of the "trunk" or hang them from the "branches" as decorative accents. This blurs the line between craft and nature, creating truly one-of-a-kind pieces.
Playing with Texture and Color
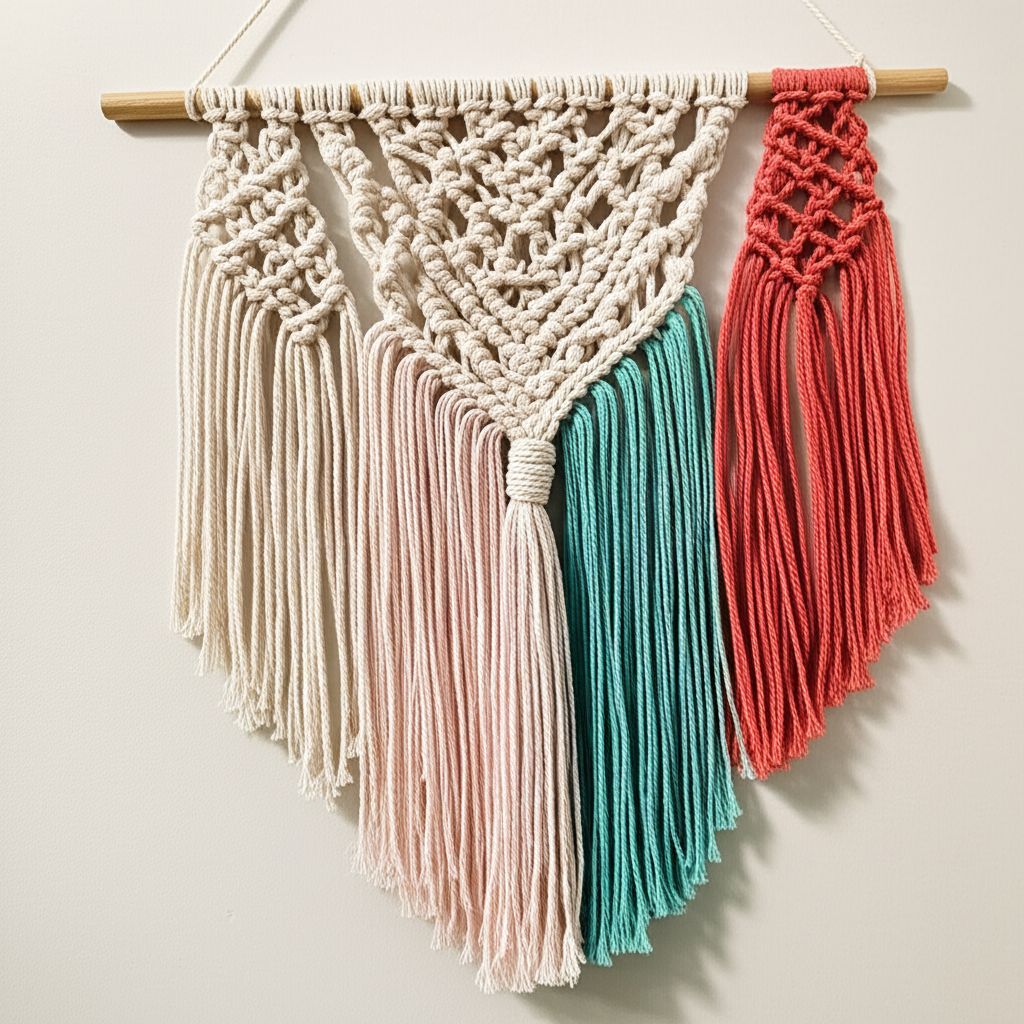
Don’t be afraid to experiment with different cord types and colors. An ombre effect in the canopy, transitioning from light green to dark, can add incredible depth. Mixing cord thicknesses can also create interesting textural contrasts – a thick, sturdy trunk giving way to delicate, thin branches. The possibilities are as endless as the variations found in nature itself.
Grow Your Own Macrame Masterpiece
Embarking on your first beginner’s macrame designs with a tree motif is a truly rewarding experience. From the satisfying rhythm of tying each knot to the joy of seeing your natural masterpiece take shape, it’s a journey of creativity and self-expression. You’ve learned about the essential supplies, mastered the core knots, and walked through the steps of creating your very own macrame tree wall hanging.
Remember, macrame is a forgiving craft. Don’t be afraid to undo a knot and try again. Each attempt is a step towards mastery. So grab your cord, find a comfortable spot, and let your hands weave the beauty of nature into your home. You’re not just crafting a decoration; you’re cultivating a connection to nature, one beautiful knot at a time. Happy knotting!