
The dining room, at its best, is a hub of connection, laughter, and delicious meals. It’s where memories are made, stories are shared, and daily life often converges. Yet, for many of us, this vital space slowly morphs into a catch-all for mail, forgotten projects, and neglected furniture. Before you know it, that elegant dining table is buried under clutter, and those charming chairs are starting to wobble.
This isn’t just about tidying up; it’s about a holistic approach we call "decluttering repairs." It’s a powerful process that combines the refreshing act of clearing out with the satisfying work of mending and revitalizing. The goal? To transform your dining room from an overlooked storage area into a beautiful, functional space ready for its true purpose. This in-depth guide will walk you through every step, helping you uncover hidden issues, tackle minor fixes, and create a dining room you’ll love to use again.
The Philosophy of "Decluttering Repairs": More Than Just a Tidy-Up
"Decluttering repairs" isn’t a new fad; it’s a mindful approach to home maintenance that recognizes the deep connection between clutter and neglect. When a space is overwhelmed with unused items, minor issues—a loose table leg, a chipped paint spot, a sticky drawer—often go unnoticed or are simply ignored because the sheer volume of stuff makes addressing them feel overwhelming.
By committing to "decluttering repairs," you’re signing up for a complete revitalization. You’ll first strip away the excess, revealing the room’s true condition. Then, with a clear view, you can systematically address the repairs and improvements that will not only enhance its aesthetics but also its functionality and longevity. It’s about restoring not just the items, but the entire atmosphere of your dining room, making it a place of pride and purpose once more.
Phase 1: The Grand Purge – Decluttering with Purpose
Before you can fix anything, you need to see everything. This initial phase is about clearing out the unnecessary, making space for clarity and action.
Setting the Stage: Preparation is Key
Approach this like a project manager. Gather your supplies: sturdy trash bags, recycling bins, several empty boxes for "donate," "keep," and "repair." Have cleaning supplies on hand – cloths, an all-purpose cleaner, a vacuum or broom. Set aside a dedicated block of time, perhaps a weekend morning, and put on some motivating music. This isn’t a quick sweep; it’s a deep dive.
The Four-Box Method for Dining Room Success
This tried-and-true method is perfect for tackling any room. Label four boxes (or designated areas):
- Keep: Items that truly belong in the dining room and serve a purpose or bring you joy. Think placemats you actually use, your good china, beloved decor.
- Donate/Sell: Items in good condition that you no longer need or want. Extra serving dishes, rarely used small appliances that migrated from the kitchen, decorative items that no longer fit your style.
- Repair: This is crucial for our "decluttering repairs" theme. Place anything that’s broken but salvageable here. A wobbly chair, a chipped vase, a lamp with a flickering switch, a stained tablecloth you want to mend.
- Trash/Recycle: Anything broken beyond repair, expired, or truly useless. Old newspapers, junk mail, single-use plastics, broken glass, frayed linens.
Go through every single item in your dining room, no matter how small. Open drawers, check under the table, look on shelves. Be ruthless but realistic. If you haven’t used it in a year, or if it doesn’t add beauty or function, it’s probably time for it to go.
Emptying the Space (Nearly!)
Once you’ve sorted everything, remove all "Donate/Sell" and "Trash/Recycle" items from the room immediately. Take the "Repair" box to a dedicated workbench or storage area. Now, with the room largely empty except for furniture and "Keep" items, you’ll have a clear canvas to assess the room’s true condition. Wipe down surfaces as you go; a clean surface makes it easier to spot imperfections.
Phase 2: Identifying and Prioritizing Repairs
With the clutter gone, your dining room is finally ready for a thorough inspection. This is where the "repairs" part of "decluttering repairs" truly begins.
The Detailed Inspection: A Room-by-Room Walkthrough
Start from the top and work your way down. Take notes or snap photos of anything that needs attention.
- Walls & Ceiling: Look for scuffs, nail holes, peeling paint, loose wallpaper seams, or water stains. Even small marks can detract from the room’s overall appearance.
- Windows & Doors: Check for sticky mechanisms, loose hardware (hinges, handles), drafts, damaged screens, or dirty glass that needs more than a quick wipe.
- Lighting Fixtures: Are any fixtures wobbly? Do bulbs flicker? Are shades dusty or discolored? Are light switches loose or unresponsive?
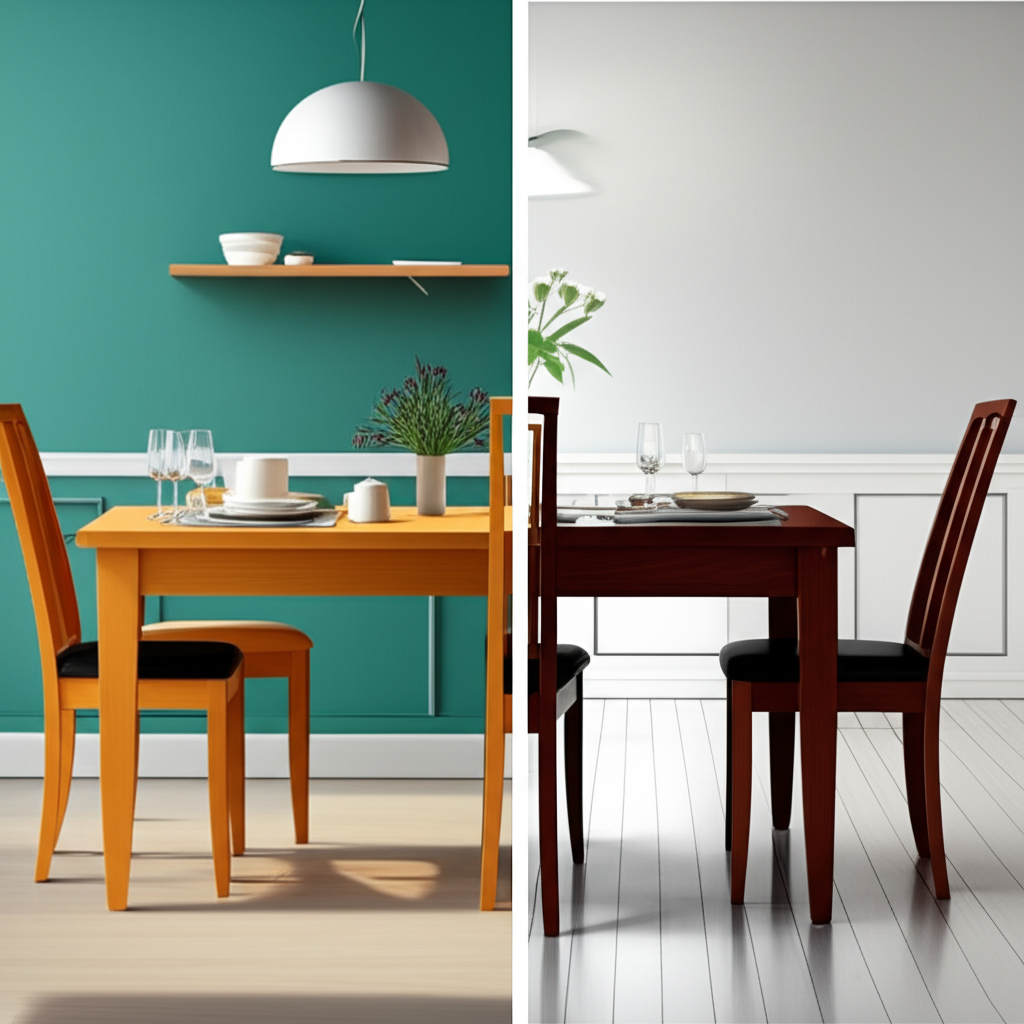
- Furniture (Table, Chairs, Sideboards, Hutches): This is often the biggest area for repair in a dining room.
- Table: Scratches, dents, wobbly legs, loose leaf mechanisms, faded finish.
- Chairs: Wobbly legs, loose rungs, split wood, damaged upholstery, loose screws. Many people store wobbly chairs in a corner, adding to clutter, when a simple re-glue could save them.
- Sideboards/Buffets/Hutches: Sticky drawers, broken hardware (knobs, pulls), loose hinges on cabinet doors, scratches, or water rings.
- Flooring: Inspect for scratches, scuffs, loose floorboards or tiles, squeaks, or worn areas on rugs.
- Decor & Linens: Even items you decided to "Keep" might need minor repairs – a picture frame with a loose backing, a decorative item that needs gluing, or linens with small tears or stubborn stains.
The Repair Checklist: From Minor Fixes to "Call a Pro" Decisions
Now, categorize your identified repairs based on difficulty and urgency:
- DIY Easy (Under an Hour): Tightening screws, patching small holes, cleaning, replacing bulbs.
- DIY Moderate (Requires Some Skill/Tools): Re-gluing furniture joints, painting touch-ups, replacing hardware, minor upholstery mends.
- Call a Professional: Electrical issues, major furniture structural damage, extensive flooring repair, significant water damage, or anything beyond your comfort or skill level.
Prioritize repairs. Safety issues (like faulty wiring or very wobbly chairs that could collapse) come first. Next, address functional issues (sticky drawers, non-working lights). Finally, tackle aesthetic improvements (scratches, paint touch-ups).
Phase 3: Executing Your Dining Room Repairs
With your list in hand, it’s time to roll up your sleeves and bring your dining room back to life.
Simple Fixes You Can Tackle Today
Don’t underestimate the impact of quick, easy fixes. They build momentum and make a noticeable difference.
- Tighten Loose Screws: A screwdriver is your best friend here. Go around all dining chairs, the table legs, sideboard hinges, and any wall-mounted decor. This often resolves wobbles and squeaks instantly.
- Patch Small Wall Holes: Use spackle or wall filler for nail holes or small dents. Apply, let dry, sand smooth, and touch up with matching paint.
- Clean and Replace Bulbs: Dust light fixtures thoroughly. Replace any flickering or burnt-out bulbs. Consider energy-efficient LED options for long-term savings.
- Lubricate Sticky Drawers/Doors: A little silicone spray, paraffin wax, or even a bar of soap rubbed on drawer runners can make them slide smoothly again. For hinges, a few drops of lubricating oil work wonders.
- Minor Furniture Scratches: Wood repair pens, scratch covers, or even a walnut rubbed into a scratch can significantly diminish its appearance.
Tackling More Involved DIY Projects
These projects might take a bit more time and a few more tools, but they are incredibly rewarding.
- Regluing Wobbly Chair Joints: This is a common dining room repair.
- Carefully disassemble the loose joints (often the legs or rungs).
- Scrape off any old, dried glue from both surfaces. Sand lightly if needed for better adhesion.
- Apply fresh wood glue generously to both mating surfaces.
- Reassemble the joint, ensuring it’s square.
- Clamp the joint tightly for at least 24 hours (or according to glue instructions). Remove excess glue immediately with a damp cloth. This simple fix can save a beloved chair from the trash heap.
- Repainting Touch-Ups or a Feature Wall: Small scuffs and chips can be touched up if you have the original paint. For a bigger impact, consider repainting an accent wall or the entire room for a fresh look.
- Replacing Broken Hardware: New knobs and pulls can instantly upgrade a sideboard or hutch. Unscrew the old ones, measure the distance between holes, and find stylish replacements.
- Deep Cleaning and Polishing Wood Furniture: After repairs, give your wood pieces a thorough cleaning with a wood cleaner, then nourish them with a good quality furniture polish or wax.
- Minor Upholstery Repairs: Small tears in chair seats can often be mended with a needle and thread, or fabric glue for a quick fix. If the fabric is significantly damaged, consider reupholstering for a complete transformation.
Knowing When to Call in the Experts
While DIY is empowering, some tasks are best left to professionals for safety, efficiency, or specialized skills. Don’t hesitate to call a licensed electrician for persistent wiring issues, a plumber for leaks (if your dining room has a wet bar), a skilled carpenter for major structural furniture repairs, or a professional painter for complex finishes or very large areas. Investing in professional help for critical repairs ensures the job is done correctly and safely.
Phase 4: Reorganizing and Maintaining Your Revitalized Space
With repairs complete and the room sparkling clean, it’s time for the final, satisfying stage: bringing your dining room back to life, thoughtfully.
Thoughtful Reintroduction of Items
Only bring back the items you designated to "Keep." As you reintroduce them, think about their purpose and placement.
- Functionality First: Are your everyday placemats easily accessible? Is your servingware organized logically?
- Aesthetic Appeal: Arrange decor pieces to create a pleasing visual balance. Don’t overcrowd surfaces. Less is often more.
- Dedicated Homes: Ensure every item has a specific place. This prevents future clutter from accumulating.
Smart Storage Solutions
Consider how storage can enhance both the function and appearance of your dining room.
- Buffets and Hutches: Utilize these for storing china, linens, and serving dishes. Ensure drawers and cabinets are organized with dividers if needed.
- Wall Shelves: If space allows, elegant wall shelves can display cherished items while keeping surfaces clear.
- Drawer Organizers: Prevent silverware or small serving tools from becoming a jumbled mess by using drawer inserts.
The Maintenance Mindset: Keeping Clutter and Repairs at Bay
Your hard work deserves to last! Adopt a proactive maintenance mindset.
- Regular Mini-Decluttering: Spend 5-10 minutes once a week doing a quick sweep of the dining room. Put away stray items, sort mail, and wipe down surfaces.
- Address Issues Immediately: Don’t let a loose screw turn into a wobbly chair. Fix small problems as soon as you notice them.
- "One In, One Out" Rule: When you acquire a new dining room item (e.g., a new vase), consider if an existing item can be donated or moved out.
- Scheduled Cleaning: Beyond daily tidying, schedule a deeper cleaning every few weeks, including dusting, vacuuming, and cleaning glass.
Conclusion
Transforming your dining room through "decluttering repairs" is more than just a home improvement project; it’s an investment in your home’s functionality and your family’s well-being. By systematically clearing clutter and addressing those long-ignored repairs, you’re not just fixing furniture; you’re restoring the heart of your home. You’ll gain a beautiful, inviting space that encourages connection, celebrates meals, and stands ready for many more cherished memories to come. So, gather your tools, roll up your sleeves, and embark on this rewarding journey – your revitalized dining room awaits!
