
Do you ever look out the window during a downpour and feel a pang of something akin to regret? Perhaps it’s the thought of all that precious water disappearing into storm drains, while your garden thirsts or your water bill quietly climbs. Maybe you’ve always meant to do something more sustainable, to reduce your environmental footprint, but life’s relentless pace has kept those good intentions firmly on the back burner.
You’re not alone. Many of us, in our busy lives, experience that quiet frustration of knowing we could be doing better, but feel overwhelmed by where to start. Rainwater harvesting often sounds like a complex, expensive project reserved for eco-warriors or off-gridders. But what if I told you it’s actually one of the simplest, most rewarding steps you can take towards greater sustainability, saving money, and finding a little peace of mind?
This isn’t about building an elaborate underground cistern or replumbing your entire house (unless you want to, eventually!). This in-depth guide is for you – the busy individual who wants to make a tangible, positive change now, without adding another daunting task to your already overflowing plate. We’re going to walk through the easiest, most efficient ways to start collecting rainwater, turning that fleeting feeling of regret into lasting satisfaction and practical resourcefulness. Let’s transform those good intentions into tangible results.
Why Now is the Perfect Time to Catch the Rain
Before we dive into the how-to, let’s quickly reaffirm why this simple act holds so much power. Understanding the benefits can be a powerful motivator, especially when time is a precious commodity.
- Slash Your Water Bills: This is often the most immediate and tangible benefit. Using free rainwater for your garden, car washing, or even non-potable indoor uses significantly reduces your reliance on municipal water, directly impacting your monthly expenses.
- A Thriving Garden: Rainwater is naturally soft, free of chlorine and other chemicals often found in tap water. Your plants, especially delicate ornamentals and vegetables, will absolutely flourish with this pure, natural hydration. You’ll notice the difference.
- Environmental Stewardship, Simplified: By reducing demand on municipal water systems, you lessen the energy used for water treatment and transport. You also help mitigate stormwater runoff, which can carry pollutants into local waterways. It’s a small act with a big ripple effect.
- Emergency Preparedness: In an unexpected outage or natural disaster, a supply of collected rainwater can be invaluable for non-drinking uses like flushing toilets or basic hygiene. It’s a quiet layer of self-reliance you’ll be glad to have.
- Personal Satisfaction: There’s something deeply gratifying about harnessing nature’s bounty. It’s a proactive step towards a more sustainable lifestyle, a quiet rebellion against waste, and a testament to your ability to make a positive change. That feeling of "regret" starts to fade, replaced by pride.
Dispelling the Myths: It’s Easier Than You Think
One of the biggest hurdles to starting any new sustainable practice is the perception of complexity. You might imagine needing specialized tools, intricate plumbing knowledge, or a massive upfront investment. Let’s bust those myths right now:
- Myth 1: It’s too complicated. False! For a beginner, a simple rain barrel system involves basic hand tools and can be set up in an afternoon.
- Myth 2: It’s too expensive. While elaborate systems can be, a basic rain barrel setup can cost less than $100-$200, often paying for itself in water savings within a year or two.
- Myth 3: It takes too much time to maintain. Not at all. A basic system requires minimal maintenance – a quick check a few times a year is usually sufficient.
- Myth 4: It won’t collect enough water to matter. Even a single 50-gallon rain barrel can capture a surprising amount of water from a small roof section, especially during a good rain event. Every drop counts!
Your journey to rainwater harvesting doesn’t require a master’s degree in engineering; it simply requires a willingness to start small and learn as you go.
Your "No-Regrets" Rainwater System: The Beginner’s Blueprint
This is where the rubber meets the road. We’re going to break down setting up your first, simple rainwater collection system into easy, actionable steps. No prior experience required.
Step 1: Assess Your Catchment Area (The Roof)
Your roof is your primary catchment area. The larger the roof section connected to a single downspout, the more water you can collect.
- Identify a Prime Spot: Look for a downspout that’s conveniently located near where you’ll use the water most (e.g., your garden, a shed, or even an outdoor faucet).
- Check Your Gutters: Ensure your gutters are clean and in good repair. Clogged gutters mean water spills over, not into your barrel. A quick visual inspection and removal of leaves and debris are essential.
- Estimate Your Potential: Want to get a rough idea of how much water you can collect? For every 100 square feet of roof area, you can collect approximately 60 gallons of water for every inch of rainfall. Even a small 10×10 foot section of roof (100 sq ft) can yield a significant amount of water!
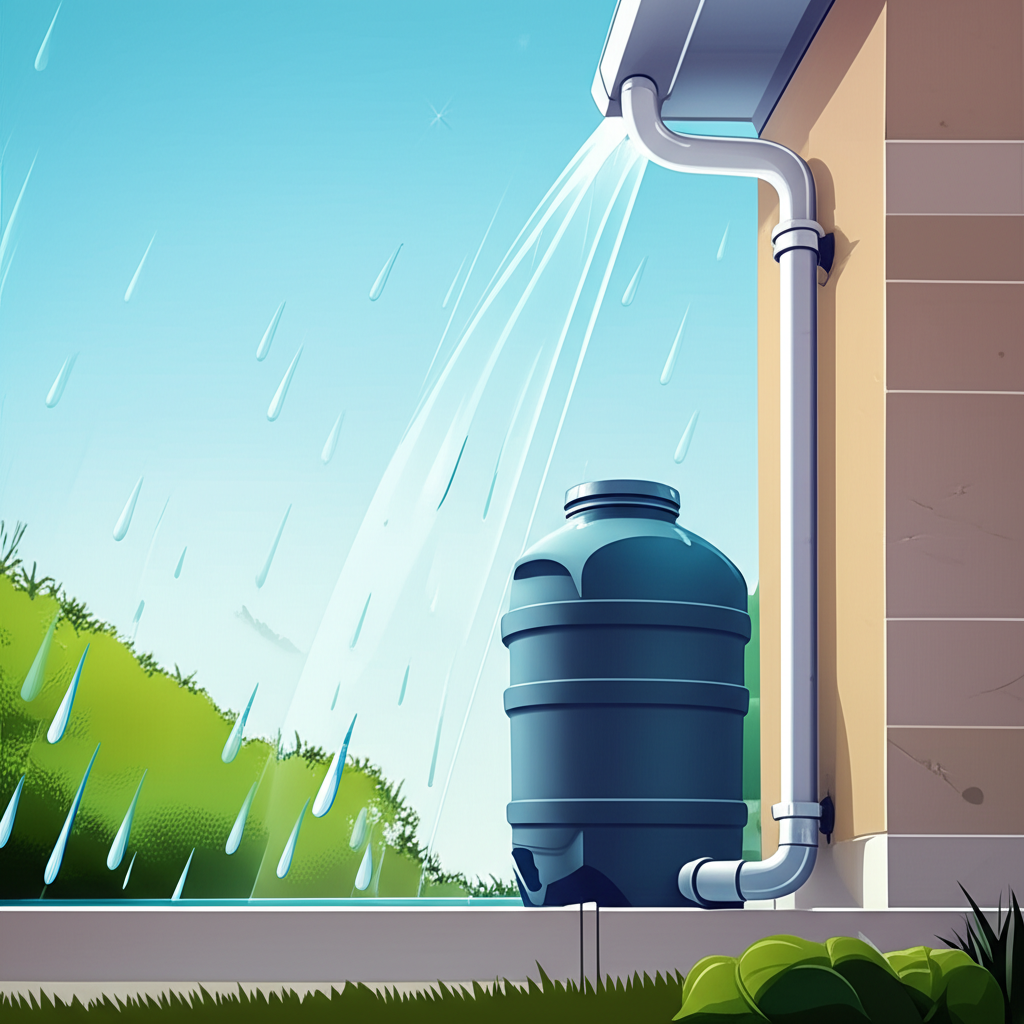
Step 2: Choose Your Container (The Rain Barrel)
This is the heart of your system. For beginners, a pre-made rain barrel is the easiest and safest option.
- Size Matters (A Little): Common sizes range from 50 to 80 gallons. A 50-gallon barrel is a great starting point – manageable, affordable, and effective. If you have space and heavier rainfall, consider a larger one or plan for multiple barrels.
- Material: Most commercially available rain barrels are made from recycled plastic, which is durable and UV-resistant. Look for barrels designed specifically for rainwater collection.
- Key Features:
- Child-proof/Mosquito-proof Lid: Crucial for safety and preventing insect breeding.
- Screened Inlet: To filter out leaves and debris from the downspout.
- Spigot/Faucet: Typically located near the bottom for easy access to water.
- Overflow Port: Essential! This allows excess water to escape once the barrel is full, directing it away from your foundation (e.g., back into the original downspout path or a designated drainage area).
- Placement & Base: Rain barrels are heavy when full (a 50-gallon barrel weighs over 400 lbs!). Place it on a solid, level surface. A few concrete blocks, sturdy bricks, or a purpose-built rain barrel stand will elevate the barrel, allowing gravity to assist water flow from the spigot. This elevation also makes it easier to fill a watering can.
Step 3: Simple Diversion (Connecting to Your Downspout)
This is where you direct water from your downspout into your barrel.
- Measure and Mark: Hold your rain barrel in place. Mark your downspout about 6-10 inches above the top of your barrel’s inlet screen. This gives you room for the diverter and ensures water flows downhill into the barrel.
- Cut the Downspout: Using tin snips or a hacksaw, carefully cut out a section of your downspout at your marked height.
- Install the Diverter Kit: This is the easiest method for busy people. Rain barrel diverter kits are readily available and designed for simple installation. They usually involve:
- Inserting a piece into the cut downspout that redirects water sideways.
- Connecting a flexible hose from this diverter piece to your rain barrel’s inlet.
- When the barrel is full, the diverter automatically sends excess water back down the original downspout. No manual switching!
- First-Flush Diverter (Optional but Recommended): For cleaner water, consider adding a simple first-flush diverter. This device diverts the initial dirty rainwater (which washes accumulated debris and pollutants from your roof) away from your barrel, allowing cleaner water to enter afterward. Many basic models are passive and require minimal maintenance.
Step 4: Water Distribution (Getting It Out)
Now that you’ve collected the water, how do you use it?
- The Spigot: Most rain barrels come with a standard spigot near the bottom. You can attach a garden hose to this for gravity-fed watering. Remember, water pressure will be low unless your barrel is significantly elevated or you use a pump.
- Watering Cans: For smaller tasks, simply place a watering can under the elevated spigot and fill ‘er up!
- Hose Connection: For more extensive watering, connect a short length of garden hose. You can use a soaker hose or drip irrigation system for efficient, low-pressure delivery to your garden beds.
Maximizing Your Harvest with Minimal Effort
You’ve got your system set up – congratulations! Now, let’s ensure it serves you well without becoming another chore.
- Seasonal Maintenance is Key:
- Spring: Give your gutters a thorough cleaning. Check your barrel for any winter damage or accumulated debris. Ensure screens are intact.
- Summer/Fall: Keep an eye on your barrel’s overflow. If it’s constantly overflowing, you might need another barrel or a larger one. Clean the inlet screen if it gets clogged with leaves.
- Winter (if freezing temperatures occur): Disconnect your barrel from the downspout, drain it completely, and store it upside down or in a sheltered location to prevent ice damage. Reconnect your downspout to its original path.
- Expand Your Capacity (Easily!): If you find you’re using all your collected water and still need more, connecting multiple barrels in a series is simple. Most barrels have an additional port near the bottom that allows you to link them with a short hose, creating a larger storage system.
- Strategic Water Use: Think about where rainwater will have the biggest impact. Prioritize outdoor tasks:
- Watering sensitive plants and vegetable gardens.
- Washing your car or outdoor tools.
- Cleaning outdoor furniture or patios.
- Topping off bird baths or pet water dishes.
Beyond the Barrel: Future-Proofing Your Water Independence
Once you’ve mastered the basic rain barrel, you might find yourself inspired to do more. This is where your initial "no-regrets" step blossoms into a broader commitment to sustainable living.
- Larger Storage: Consider larger, more permanent tanks (200+ gallons) if you have the space and need more water. These often integrate seamlessly with your existing downspouts.
- Pumping Power: For higher pressure, you can add a small, inexpensive pump to your system, allowing you to use sprinklers or reach further areas of your yard.
- Irrigation Integration: For the truly ambitious, collected rainwater can be fed into a dedicated drip irrigation system, providing automated, chemical-free watering for your landscape.
- Greywater Recycling: While a step beyond rainwater harvesting, these two systems complement each other perfectly, maximizing your home’s water efficiency.
The beauty of starting small is that it builds confidence and provides a tangible demonstration of success. You’ve moved from intention to action, from regret to resourcefulness.
Conclusion: Your Journey to Water Wisdom Starts Now
The journey to a more sustainable lifestyle doesn’t require grand gestures or radical overhauls, especially for busy people. It begins with simple, achievable steps that deliver real, measurable benefits. Setting up a basic rainwater collection system is one such step – a powerful antidote to that nagging feeling of "I should be doing more."
You’ve now got a clear, actionable blueprint to transform passive rainfall into an active resource. You’ll save money, nurture your garden with superior water, and contribute positively to your local environment. More importantly, you’ll gain the immense satisfaction of taking control, making a difference, and living more harmoniously with the natural world.
So, the next time the heavens open, don’t just watch the rain fall. Celebrate it as a free, vital resource, ready to be harnessed. Take that first step, set up your rain barrel, and turn those past regrets into a future filled with smart, sustainable living. Your garden, your wallet, and your peace of mind will thank you.
